So as I promised here is a BatRep from the 40k in a Flash game I had last week. It was Space Wolves VS Space Marines. We ended up playing Dawn of War / Annihilation and my opponent went first. His list from memory consisted of...
6x Gray Hunters, Meltagun
7x Gray Hunters, Meltagun
3x Thunderwolf Cav. 1 w/Power Fist, 1 w/Storm Shield, 1 w/nothing extra
1x Lone Wolf w/Power Fist(?)
5x Wolf Scouts w/Meltagun
As he did not need to take an HQ he opted not to. His territories give him a lot of wargear points and I think he spent them well with all the Power Fists and Meltaguns.
My list consisted of
5x Scouts w/Power Fist, Combi-Melta
Land Speeder Storm w/Multi-Melta
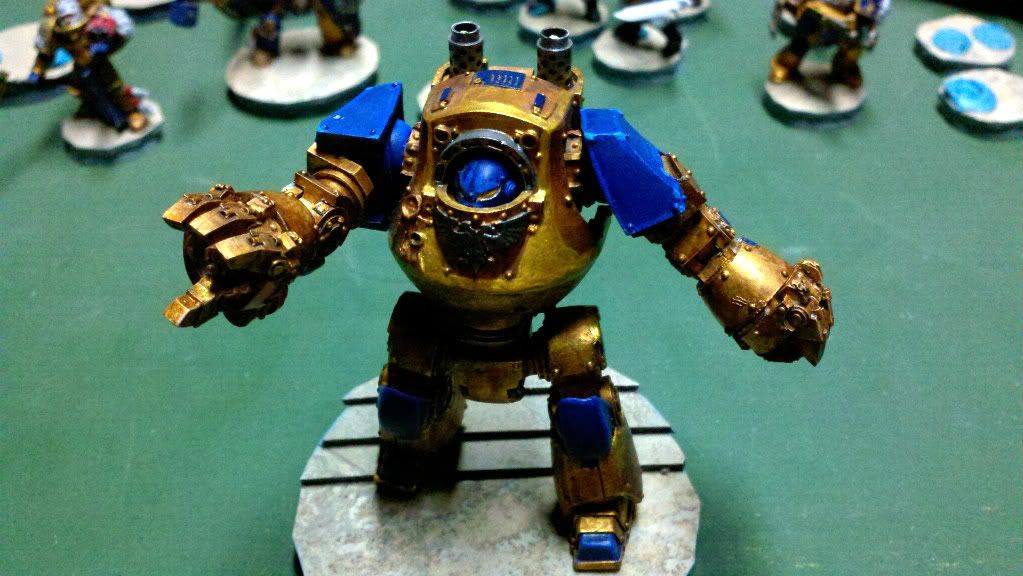
Ironclad Dread w/H.Flamer & 2 HKMs
Land Raider Redeemer
I opted to go with only 1 troop as it had a nice fast transport that I can deliver them where needed and had some decent weaponry for a low points cost. And as I had a increased cap on my vehicles I took a Land Raider Redeemer to capitalize on it, with the Ironclad to give some nice hand to hand support as well as some longer ranged fire with the HKMs.
In this campaign you don't have to show your opponent your list, this is something that a "Spy" can do for you if you get one and have a lucky roll at the start of the games. So I don't know what he took and he does not know what I have planned for him. For Deployment my opponent set his Gray Hunters on the center line to push me back as far as possible and he is outflanking with his Scouts. Everything else is coming on turn 1. I inform him that I will have everything come on the table turn 1.
SW Turn 1. He moves his Gray Hunters back 6 and runs them back. His Thunder Wolf Cav come in behind the GH and runs, same with his Lone Wolf.
SM Turn 1. I move the Ironclad in just left of center moving in with a wall and ruined building on his sides to protect his flanks. The Land Raider moves 12" in the center on my board edge. And lastly the Land Speeder Storm with the Scouts move 24" on my far right flank behind some ruins. The Dread runs a few inches closer to the Gray Hunters.
SW Turn 2. The Gray Hunters, Lone Wolf and Thunder Wolf Cav all start shifting towards the center of the table away from the Ironclad and closer to the Land Raider. The Scouts did not come in. The unit of Gray Hunters shoot a Melta at the Land Raider but miss. The Lone Wolf and Cav run closer to my right so they are closer to the center of the table without moving too close to the Land Raider.
SM Turn 2. I move the Ironclad back a bit as I don't want him to eat a Melta from the Gray Hunters too early in the game. I move the Land Raider 6" over a low wall nice and close to one of the Gray Hunter squads. The Land Speeder moves another 24" up and towards the center of the table by a 4 story ruined building. The Ironclad shoots it's HKMs at the T-Wolf Cav and misses both shots. The Land Raider uses a Flame Storm on a squad of the Gray Hunters and kills all of them, and shoots the Assault Cannon at the T-Wolf Cav with no effect.
SW Turn 3. The Wolf Scouts come in on my right flank behind my Land Speeder. The T-Wolf Cav move strait for the Land Speeder, the Lone Wolf heads for the Land Raider and the Gray Hunters head for the Land Raider. The Wolf Scouts Melta the back of the Land Speeder and destroy it. The Scouts pile out the back closer to the Wolf Scouts and away from the T-Wolf Cav. The Gray Hunters Melta the Land Raider and Immobilize it. The Lone Wolf runs toward the Land Raider and the T-Wolf Cav run towards the scouts.
In assault the T-Wolf Cav make it to the scouts after passing a difficult and dangerous test for moving into the wreaked Land Speeder. In the combat 1 scout dies and cav take 0. The Scouts run and get away about 6 inches. The T-Wolf Cav follow them close behind.
SM Turn 3. I move up the Ironclad and Scouts continue to fall back. In the Shooting phase the Ironclad shoots at the Gray Hunters killing 1 with a Melta shot. The Redeemer splits its fire. 1 Flamestorm at the Gray Hunters and 1 at the T-Wolf Cav that are running after the scouts. I put 2 wounds on the T-Wolf Cav and take the Gray Hunters down to 2 men. The Scout Sargent shoots his Combi-Melta at the T-Wolf Cav as it may be the only time he gets to shoot and gets a wound through killing 1 of the Cav.
In the assault the Ironclad charges the 2 remaining Gray Hunters killing 1. They do nothing in return and pass their test.
Yay I got into the action!
SW Turn 4. The Wolf Scouts move towards my board edge and closer to the fleeing Scouts. The Lone Wolf Moves again towards the Land Raider (now within charge distance of the Raider and the Ironclad Dread.) The T-Wolf Cav move in between the fleeing Scouts and the Land Raider. The Wolf Scouts run closer to my table edge and the Scouts. The T-Wolf Cav Charge my Scouts and kill 3, the Power Fist Sargent kills the Storm Shield Wolf. I pass my test and hold fast. The Loan Wolf assaults the Land Raider instead of the Ironclad, destroying a weapon. The Ironclad wiffs and does nothing to the last Gray Hunter.
SM Trun 4. Nothing moves as it's all locked in combat or immobilized. The Land Raider puts all it's fire into the Lone Wolf and kills it. The Ironclad kills the last Gray Hunter and consolidates closer to the Land Raider. The T-Wolf Cav with Power Fist faces off with the Scout Sargent with Power Fist... They both swing, and the T-Wolf Cav takes 1 wound bringing him down to 1 and the Sargent takes 2 wounds from the Cav Fist finally turning him into goo. The T-Wolf Cav. consolidates towards the Land Raider.
SW Turn 5. The Scouts stay in some cover. The T-Wolf Cav. moves and assaults the Land Raider. The result is only that the Land Raider is Stunned.
SM Turn 5. The Ironclad moves and shoots the T-Wolf Cav. The T-Wolf Cav. dies to the Meltagun.
Now it's down to the Ironclad and the Wolf Scouts. The Game continues to turn 6.
SW Turn 6. The Wolf Scouts move and run away from the Ironclad. They are now on my table edge behind a hill.
SM Turn 6. The Ironclad moves and runs towards the Scouts.
If this goes 1 more turn the Scouts will have no where to run as the Ironclad will be in Flamer range and may even be in charge range no matter where they go. But the game Ends. The Celestial Lion Space Marines win 3-2.
The Territory that the Space Wolves put up was worth 10 wargear, the Territory that I put up was worth 10 points to the army size (but increases by d6x10 because I wagered it, and is now worth 20 points), the Territory generated was also worth 10 wargear. As I won I kept my territory and chose to go with the new territory as it was the same as what my opponent wagered.
My MVP had to be my Scout Sargent with Power Fist. He was able to finish off a couple of the T-Wolf Cav. and put a wound on the last one allowing the Ironclad to seal the deal with a Melta shot. I will have to give him a new Purity Seal for his good work.
I will have to remember to take more pictures to help liven up the BatReps a bit. Now only if I had a video camera...


No comments:
Post a Comment